
In September 2025, I bought a 100+ year old house in need of updating, and not all glamourous ones....
I saw the house a few times when I was looking at houses. Each time, I thought "this would be a cool house, great location, but it needs a lot of work and I'm not sure I'm up for it". Well, after several visits, and reaching out to an architect I had worked with in the past, I decided this was the house for me.
The house needed new electrical work, some work on water issues in the basement, and new siding. Other improvements that I wanted included a tap into the public water system. The water line runs right at the end of the driveway but the previous owners were fine using the existing well water. Although the owners kids (all in their 60s and 70s, so not really "kids" anymore) didn't know the details, they thought their dad "dug" the well so that probably means it was installed in the 1940s or 50s. It's also notable that the immediate area is a historical oil field and pictures of the house in the early 1900s shows many derricks in the background.
As a geologist who works with oil and gas wells, I know all the things that can go wrong with a well of a certain age. I didn't want to worry about an unexplained water outage in the middle of the night, or during a holiday weekend, or when visitors are coming. (BTW, I lived with well water before and dealt with all three situations, so there is no exaggeration for me on the anxiety associated with those possibilities again).
Back to the house. Since I was going to be doing the necessary items to update the internal workings of the house, I thought it would be good to update some of the floorplan too. When I bought the house, it had 3 bedrooms and 1.5 bathrooms; not bad, but 3 bathrooms would be more functional for the family and for hosting events at the house. Also, I wanted to update the kitchen with a more user friendly layout.
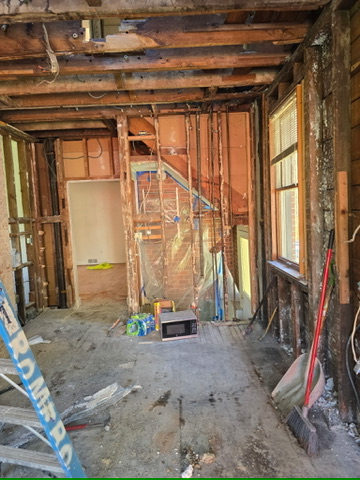
The appliances in the kitchen were relatively new and in good working order but I wanted to update the look and the layout. In addition, we knew there was a hidden fireplace that split the kitchen and dining room. I wanted to expose it and use it as a central element of the design - I didn't need the fireplace to work, I just wanted the aesthetic.
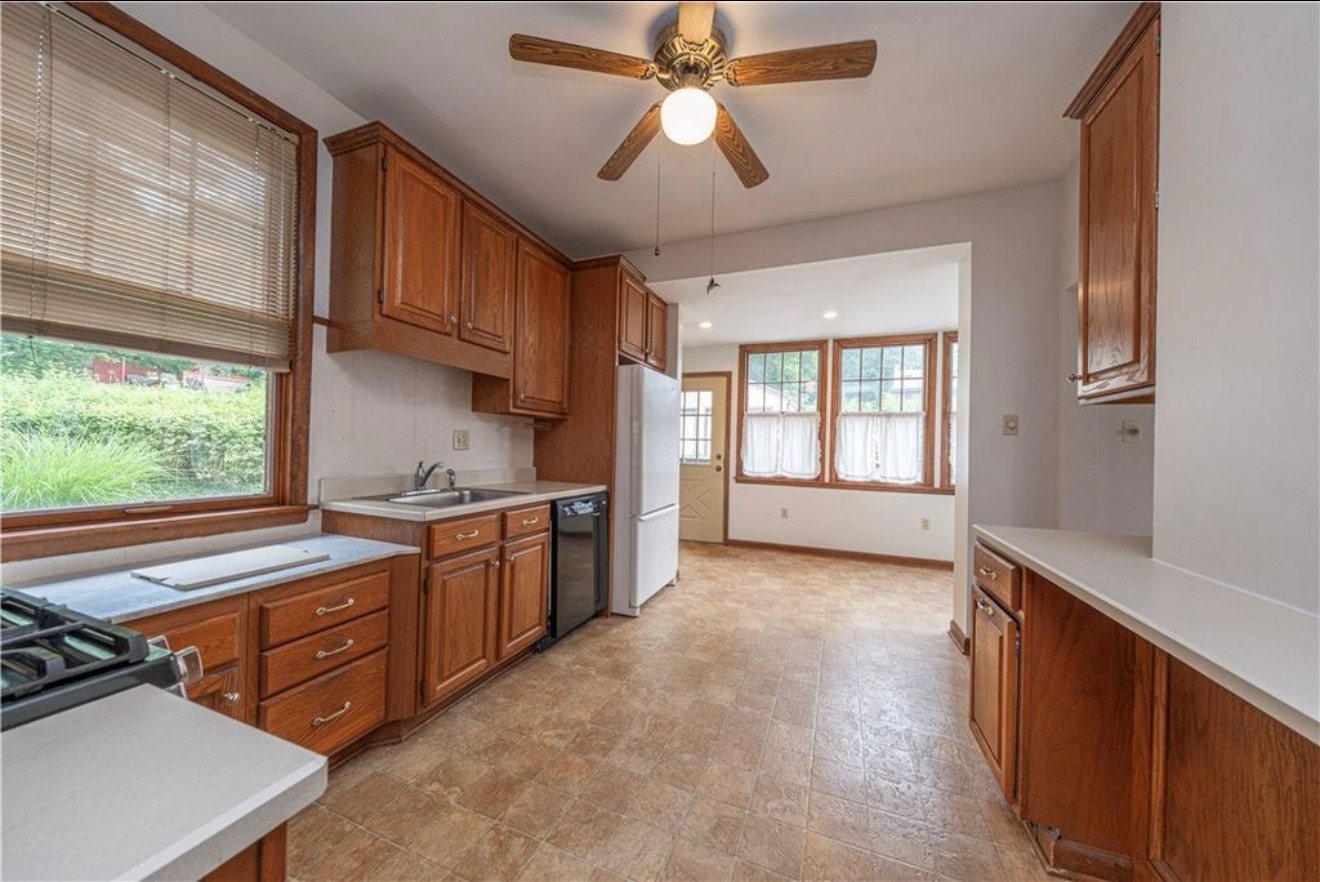
Here is the original kitchen layout. The all white wall on the right is where the brick fireplace was behind the drywall.
Because I had a lot on the list for renovations, I really wanted to re-use the existing all wood kitchen cabinets to save money. I was so excited to use the cabinets, I measured every dimension I could think of when the cabinets were still hanging in the kitchen. It took a few meetings with the architect to get each piece in a spot that made sense for the functionality of the kitchen, and it took a lot of imagination since I wasn't able to see the house.
Keep in mind, during the beginning part of the renovation, I was still living out of state so I couldn't just pop over and check out the progress - I had to wait for the architect or the general contractor to be there and get on a FaceTime call with me. We had many emails, texts, and FaceTime interactions to get the layout just right. However, I still missed that the original cabinets had very few associated drawers. In my finished kitchen, I have a total of 3 drawers: one for silverware, one for miscellaneous kitchen tools, and another lovingly referred to as a junk drawer. In my last house, I had drawers so large I could store my pots and pans in them. I also had extra drawers that were EMPTY! Those were the days!
The realization about the kitchen drawers didn't occur to me until we were moved in and all the cabinetry was in place. It just meant I needed to be a bit more creative with the insides of the cabinets. I spent hours wandering the aisles of Target and the Container Store looking for baskets and other organizing tools that would fit my older style cabinets. I found baskets for the less-used kitchen tools as well as my overabundance of unique spices! I found organizing tools I hadn't considered before, like a cubby that hangs from the shelf above. This has worked out great for my oven mitt collection. I definitely recommend it!
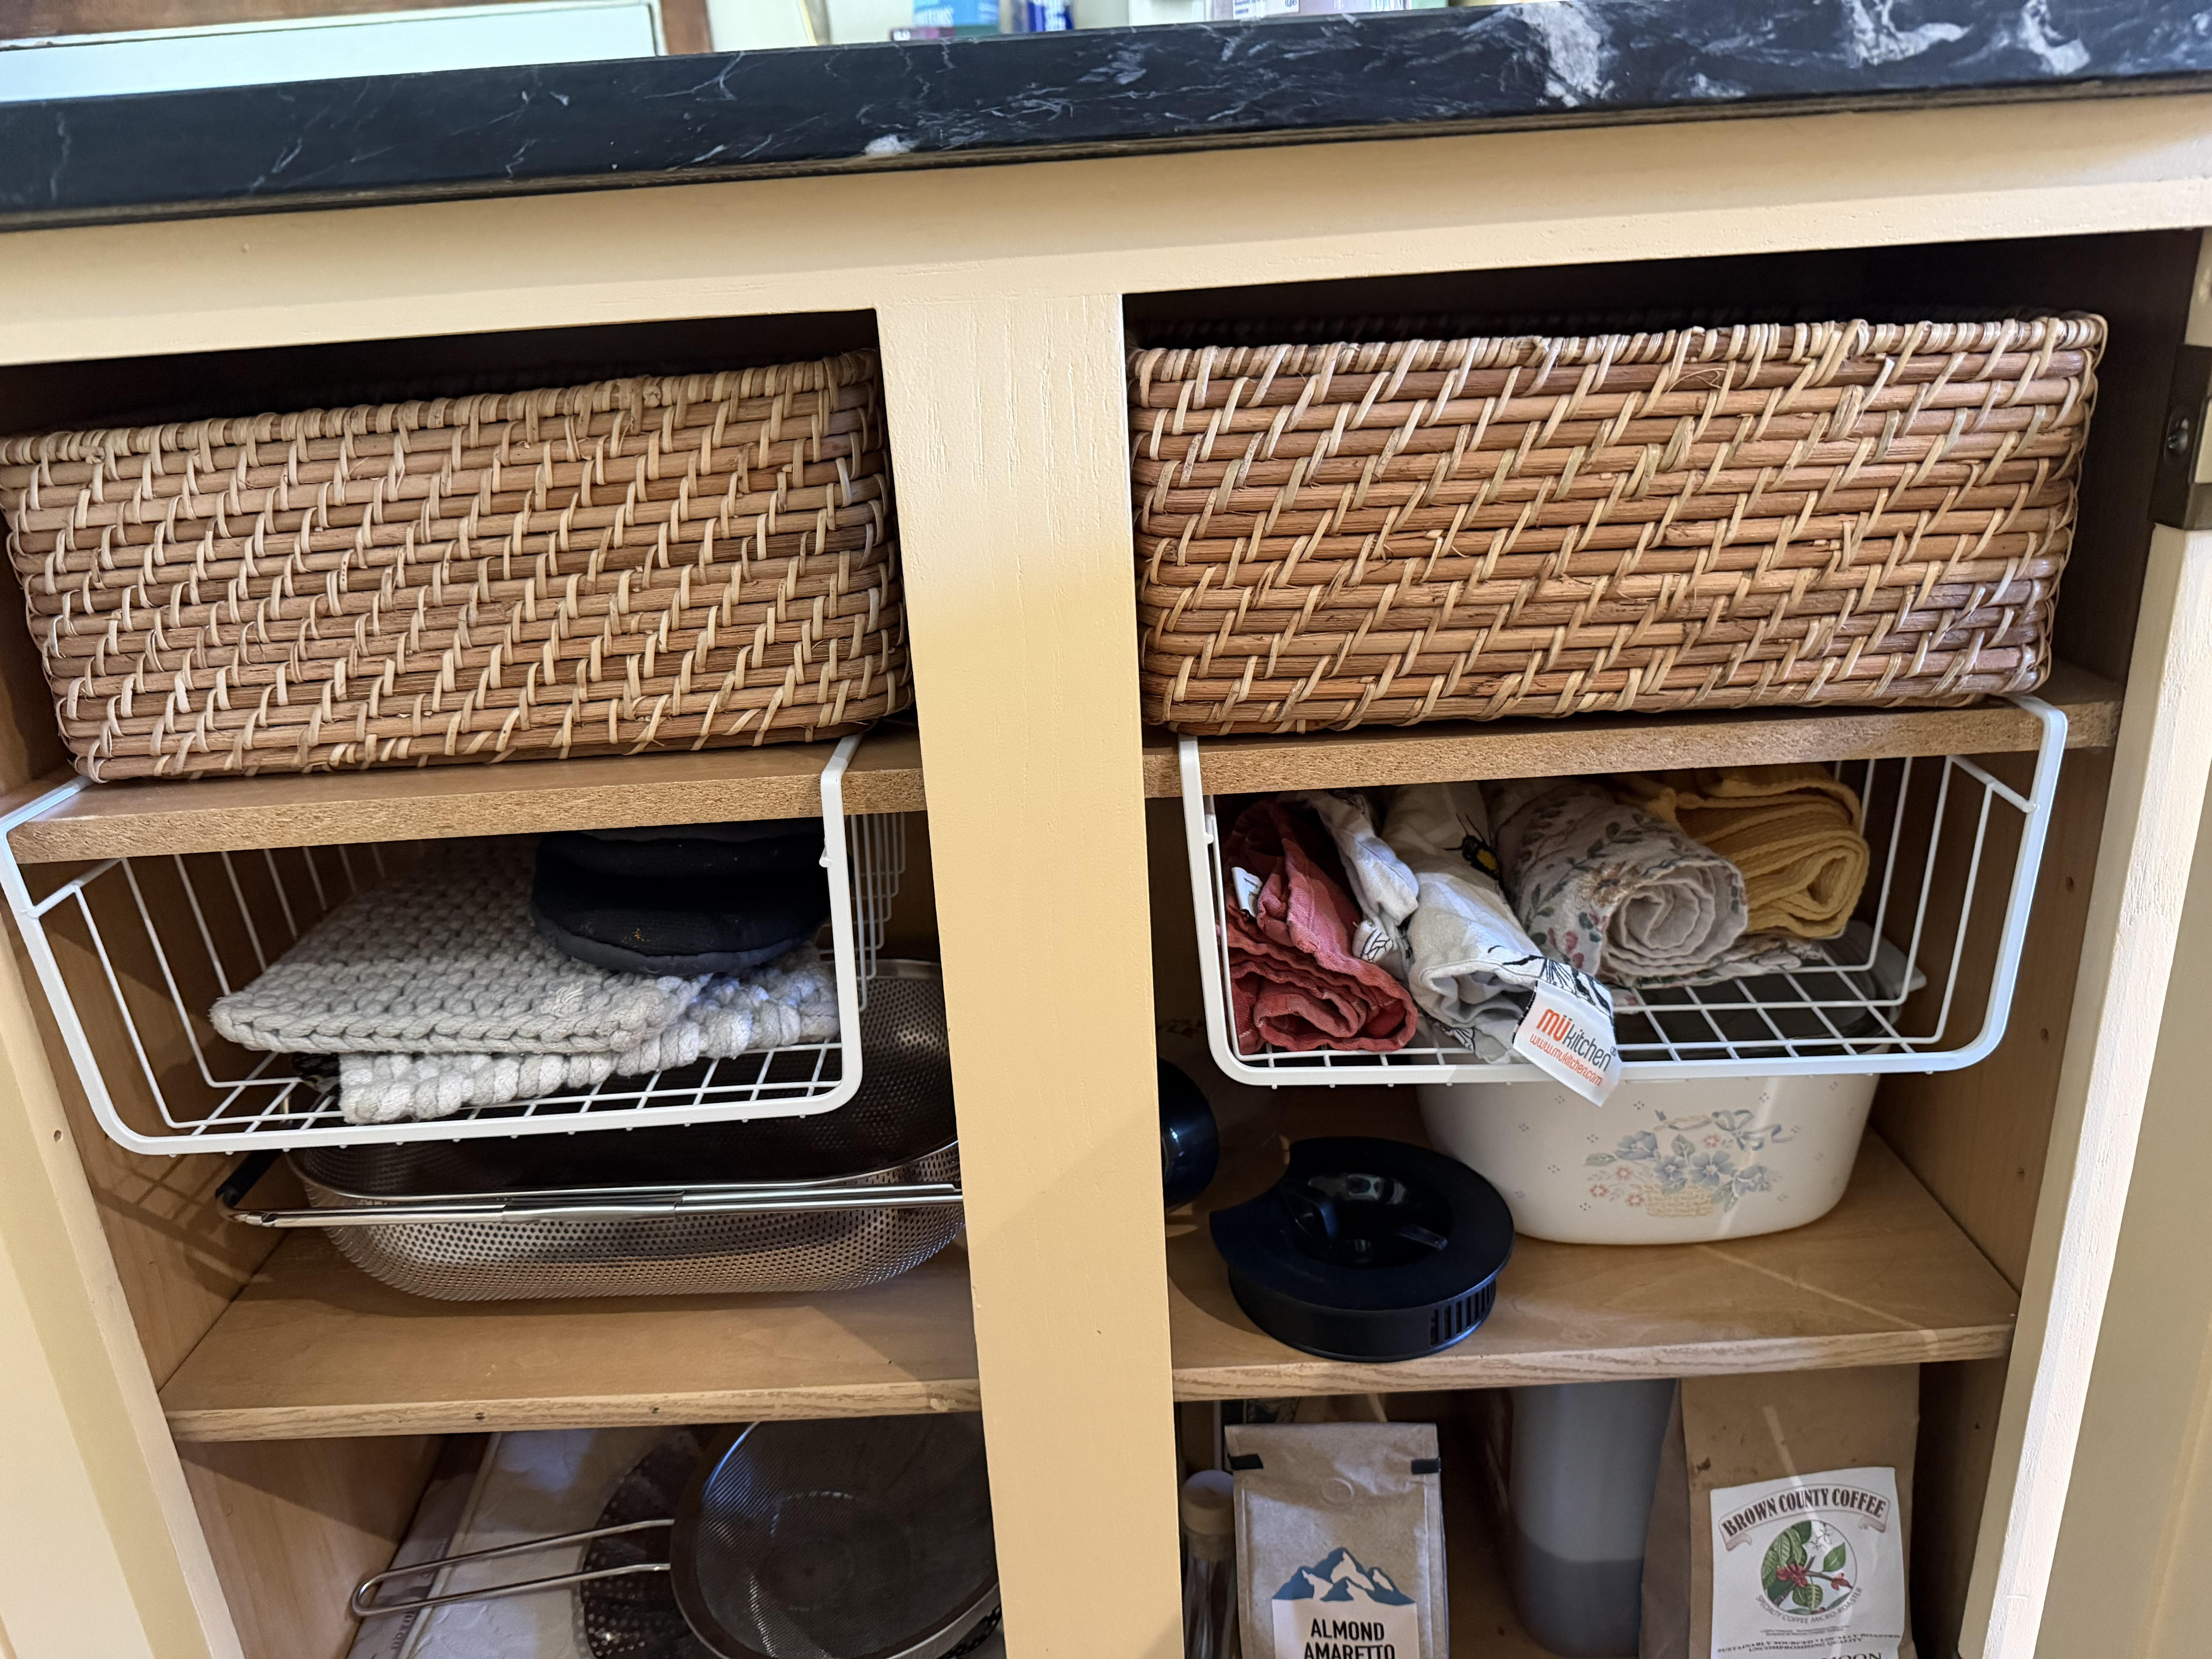
My cubbies hold towels and oven mitts in the empty space above the casserole and strainer
The final decision for the kitchen was picking the colors. This was a big decision for me since I still wasn't living in the same state. Colors are so subjective, especially with different lighting and times of the day. I knew I wanted a yellow, but which one?!? Did I want Ambitious Amber or Bees Wax, or Peace Yellow? so many choices...
After many sessions with the Sherwin Williams color app, I picked the final two contenders. The general contractor grabbed sample cans of the paint and painted sections of the cabinets for me to see in the kitchen light. However, there was another wrinkle in the color adventure. Since I'm a geologist and obviously love rocks, I had to get a unique kitchen countertop.
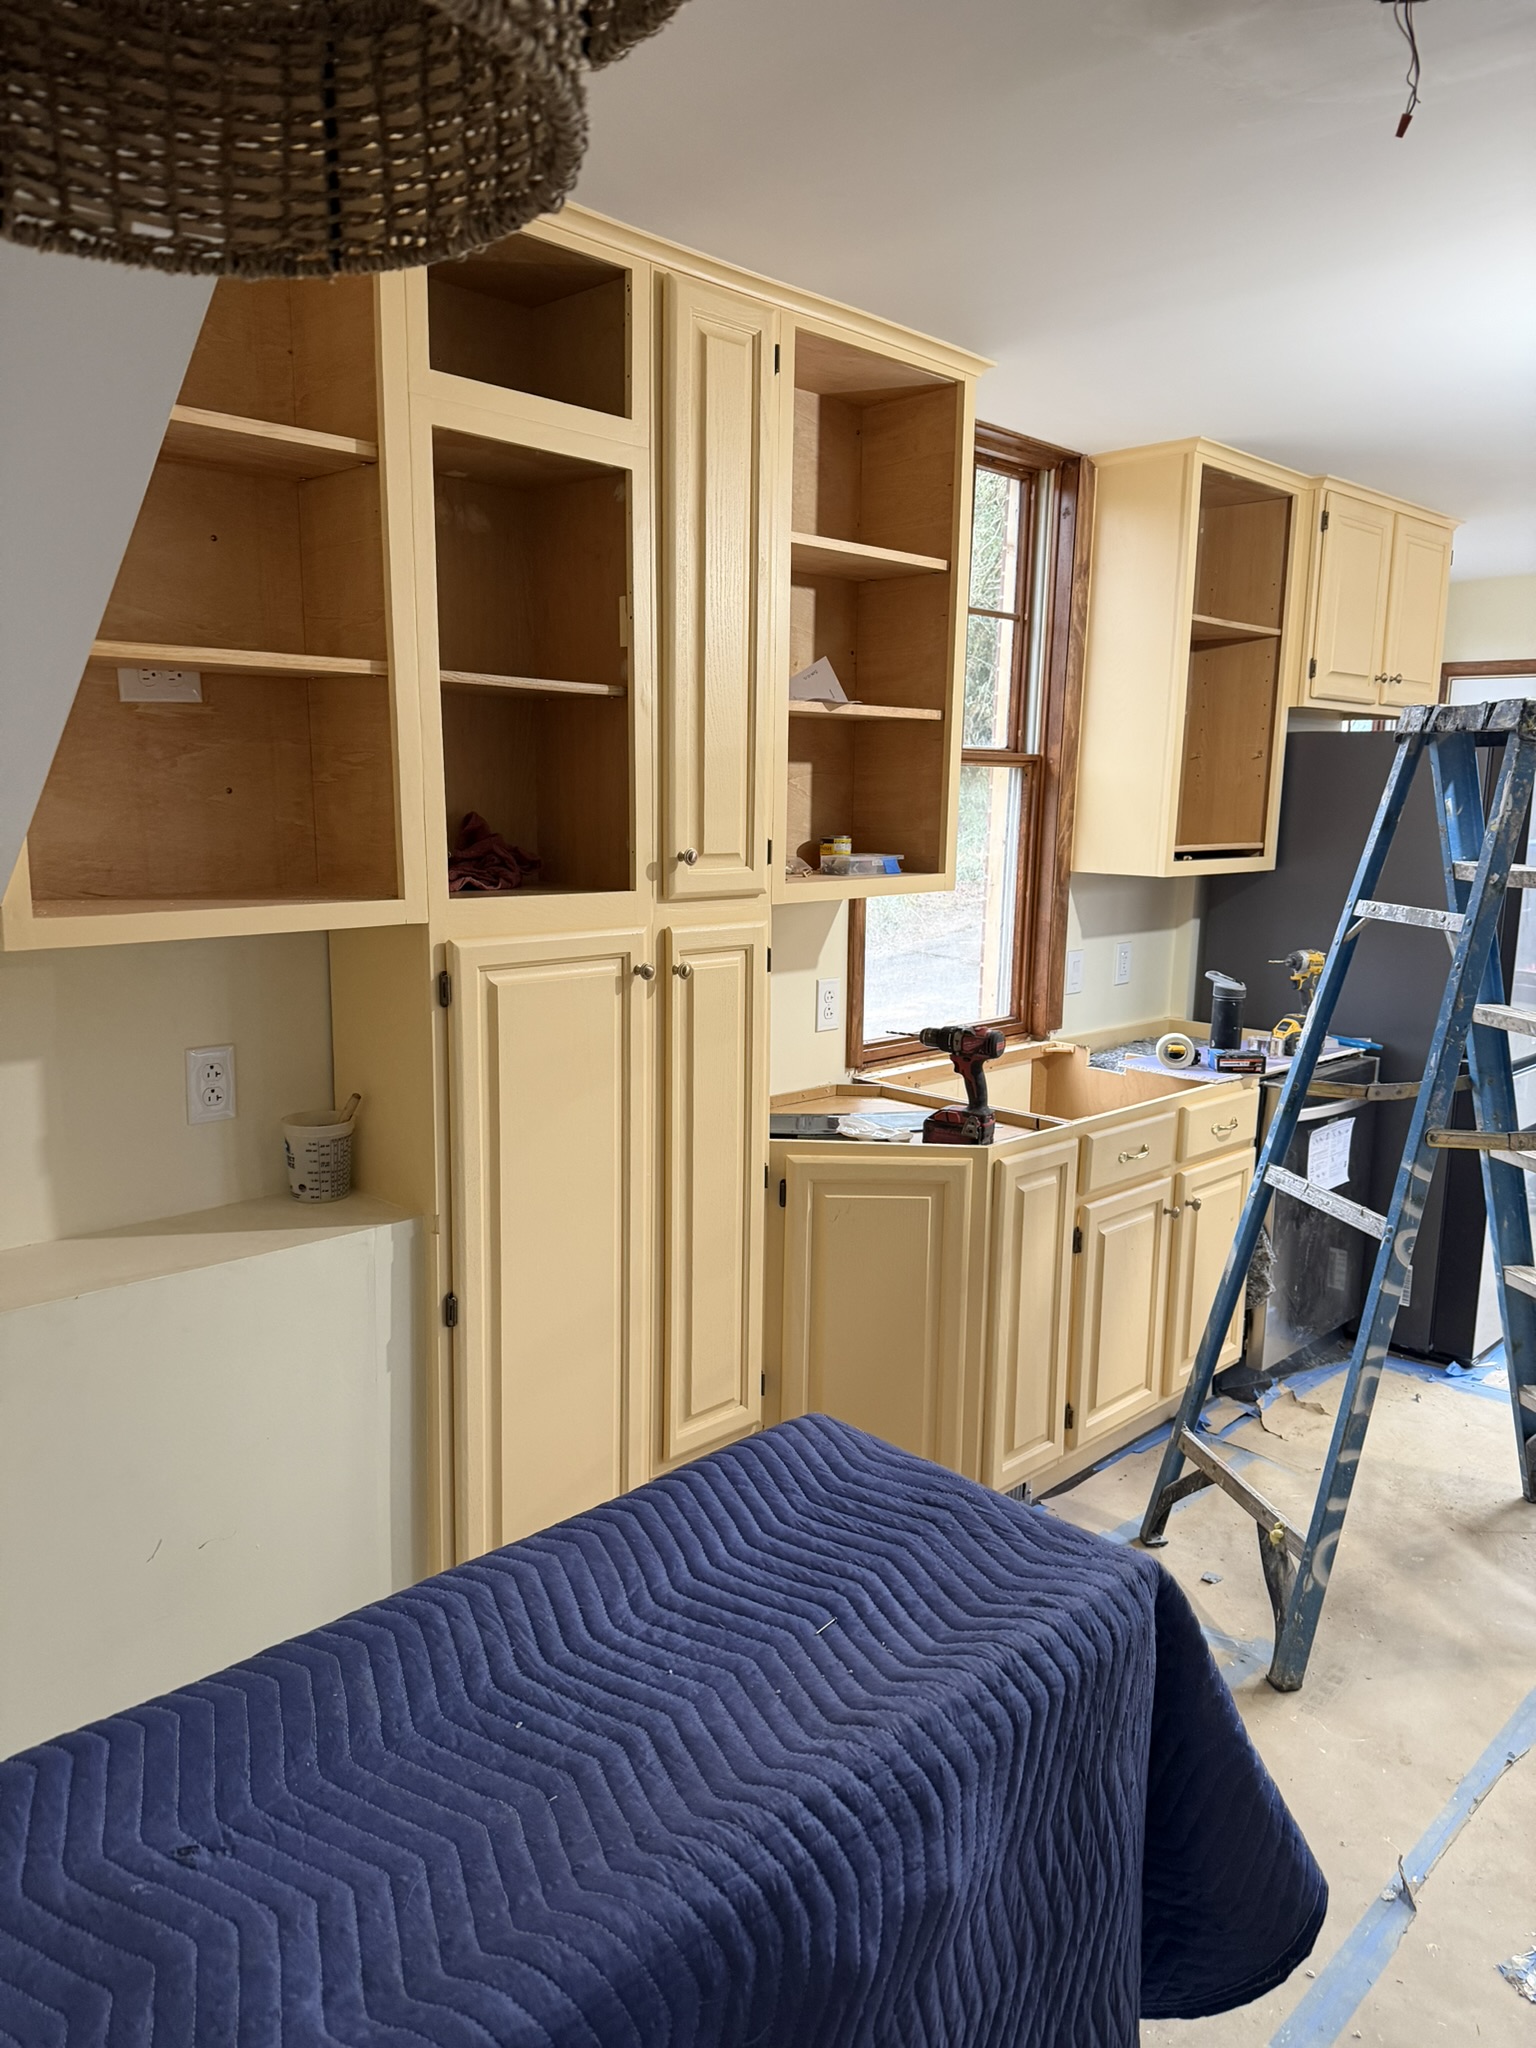
Painted cabinets before the countertop installation
I spent sometime at the countertop store and picked out black soapstone. Soapstone countertops are commonly green and were a staple of many high school chemistry labs because they tolerate heat so well. It happens that soapstone also has anti-bacterial traits which makes it great for food handling as well. One of the drawbacks of soapstone is that it can chip easily so you have to live with some blemishes at some point.
The black soapstone I chose was not truly black, but was a darker green than the typical soapstone. If I oiled the countertop, it will appear almost black but I would lose some of the glittery specs present from the micas in the stone. This particular slab also had fantastic white veining throughout. I was truly amazed when I first saw a picture of it.
Now given all the colors in the countertop (dark green, white, and gold flakes) it was unknown how the golden yellow cabinets would look next to it. But, there was nothing left to do because the cabinets were painted and the slab was getting cut so I had to let go of those anxieties.
When the countertops arrived, it was the night of December 23rd so they had to go in for me to cook on Christmas Day! The color contrast between the cabinets and the countertops did seem stark in the harsh December sunlight. But, I reminded myself that once the color soaks into the wood, the color can shift slightly to a different shade...and, it did!
Initially, my son, who minors in multi-media design at college and has an eye for color, told me the colors are fighting each other. But, months after the initial install, we all agree now that the color on the cabinets has mellowed to a nice warm golden color. It also helps that my youngest son insisted on soft yellow light bulbs for the kitchen which really accentuates the warm aspects of the colors.
So, after all the internal drama on kitchen layout, cabinetry fails, and color choices, (just drama between myself and I) I will say, in the end, I'm happy with my kitchen. Some things will never change in my kitchen - like the fact that the dogs are ALWAYS underfoot, so the kitchen is not very wide, we are learning to live with it, and even love it.
No matter what, old houses lack storage so you have to be creative, especially if you are remodeling on a budget. If you are thoughtful and think through the ramifications of storage placement and in cabinet options, you will be able to make the kitchen work for you!